
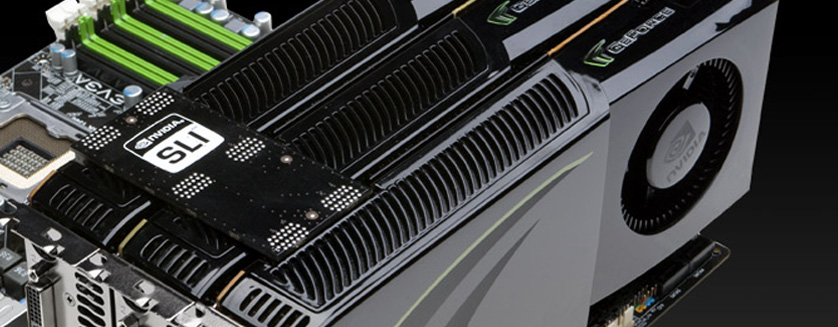
What is NVIDIA SLI Technology? NVIDIA SLI (Scalable Link Interface) technology is a revolutionary platform innovation that allows you to intelligently scale graphics performance by combining multiple NVIDIA graphics solutions in a single system with an NVIDIA nForce SLI media and communications processor (MCP).
How Does SLI Technology Work? Using proprietary software algorithms and dedicated scalability logic in each NVIDIA graphics processing unit (GPU) and MCP, NVIDIA SLI technology delivers up to twice the performance of a single graphics solution.
1. What is SLI?
2. GPU Scaling
3. Requirements
4. How to Build a Quad SLI Gaming Rig
5. How to enable Hybrid SLI
Introduction
Games appeal to a gloriously excessive nature; we take on endless hordes of enemies through a hail of bullets, slay ferocious beasts in a flurry of might and magic, lead armies to victory against nefarious empires, eradicate menaces throughout the galaxy and, if we have the time, maybe even save a princess or two. And what do we do when that's all done? We do it again, but with MORE! We want bigger challenges, faster completion times, and stronger upgrades. We simply want better results, and gamers expect no less of graphics: we want well-defined lighting and shadows, crisp textures, detailed worlds, natural physics, clean edges, and, most importantly, high frame rates. When it comes to hair-raising visual effects at ballistic speeds, NVIDIA's SLI technology is a special power-up.
Overview
This guide will introduce NVIDIA's SLI technology, an innovative feature capable of enhancing performance and image quality in thousands of PC games. In this we will find out what exactly SLI is, examine how it works, explore the various hardware requirements, break down the different visual settings and components available in the NVIDIA Control Panel, and understand how to make it all work best for us. The level of detail here won't be extreme, but there is a lot to cover, so if you're in the mood for something that's easier to chew give SLI FAQ a look.
- 1. What is SLI?
The best way to start would be learning what SLI actually is, so let's jump right to it: SLI is a multi-GPU (Graphics Processing Unit) scaling engine, essentially a method of using more than one graphics card to boost in-game performance by up to +100% per additional GPU. The principle is beautifully simple, and it is equally simple to use because the technology is neatly contained within all modern GeForce graphics drivers and many GeForce GPUs. We'll cover the specific requirements in a bit, but for now, let's take a closer look at how SLI functions.
NVIDIA's SLI technology is an exercise in parallelism, which GPUs already do on a massive scale. Commonly, SLI systems are identified as being "n-Way SLI" configurations, and within the context of this guide: "2-Way SLI" applies to any system using two graphics cards in SLI; "3-Way SLI" for any system with three graphics cards in SLI; and "4-Way SLI" denoting any system with four graphics cards or GPUs in SLI (so as to be applicable for two dual-GPU cards in SLI.) By allowing multiple graphics processors to independently work on rendering a single 3D environment, we can theoretically multiply our frame rate by the number of new GPUs. This is accomplished through the graphics driver, which determines how the GPUs will behave and assigns what data they will be responsible for rendering. With the scene loaded up - and once the CPU finishes "pre-render" tasks like setting up vertices for objects, collision detection, AI behavior, interface updates, audio processing, and network communications - the SLI-linked graphics cards receive the rendering information that determines what will end up on the screen and how it will appear. This data is shared between the cards in their own individual memory spaces since they are all rendering the same environment, and from there, it comes down to how the GPUs are working together: Alternate Frame Rendering (AFR) for supercharged performance or SLI Antialiasing (SLI AA) for exceptional image quality.
Alternate Frame Rendering (AFR)

Alternate Frame Rendering is the performance rendering mode for SLI, and it works by designating a particular frame subset to each GPU. In a 2-way SLI configuration, for example, GPU 1 would render all odd-numbered frames while GPU 2 renders all of the even-numbered frames. When using three or four GPUs, the GPUs render one of every three or four frames respectively. The essential principle behind AFR is keeping the GPUs working as independently as possible for maximum performance gains, and that takes a well-defined SLI rendering profile. These are being written and optimized for many different titles all the time, so check for new GeForce drivers often! If you would like to submit a request for an SLI profile update for a game or 3D application, click here.
SLI AntiAliasing (SLI AA)

SLI Antialiasing is an image quality-focused rendering mode that divides an anti-aliasing (AA) workload between the GPUs for smoother edges at a reduced performance cost. In 2-way SLI, both GPUs will render the exact same frame, but perform sub-pixel sampling using offset coverage points that will be merged together to provide a much smoother-looking image. This option is available for 3-way and 4-way SLI systems, and behaves similarly. This mode is ideal in cases where performance is already acceptable but higher image quality is desired; by sharing the AA work between the GPUs, the appearance of a game is improved with no performance lost compared to running a single GPU. For example, 2-way SLI AA 8x would offer the performance of a single GPU running 4x AA, yet the image quality would be appreciably better. This option is found in the NVIDIA Control Panel, for all application profiles in the "Antialiasing - Mode" drop-down menu, and will automatically ignore/override established SLI rendering modes for that profile. - 2. GPU Scaling
Before we continue any further, let's pause to consider what defines multi-GPU systems: scaling. By this we mean how much benefit we're seeing from additional GPUs, be it one (2-Way SLI) or three (4-Way SLI,) in contrast to single-GPU performance. Ideally, performance would increase linearly with the amount of devices introduced, meaning if we added a second GPU we'd see our performance double. Realistically, 2-way SLI can come very close to that. 3-way and 4-way SLI systems can yield impressive results as well, however they are liable to show diminishing returns as a result of becoming progressively more limited by the CPU.
How well SLI scales depends on how efficiently the game is able to handle multiple GPUs, how developed the SLI profile for that game is, and also how busy we can keep the GPUs. That last part means we have some responsibility in the scaling equation: making sure the GPUs are the bottleneck in our system. This is not so straightforward, however; because we can define hardware boundedness purely by which subsystem we're waiting on the longest - be it only a few milliconds or a few dozen - scaling isn't exactly predictable or consistent within even a single area of one game because rendering conditions can change very rapidly, but as we'll see in a moment, there is another side to bottlenecking that can be born from multi-GPU systems
If we were to massively simplify the process of creating a frame in an 2-Way SLI system then measure how long each component took to complete its share of the work, it might look like one of the images below. Each individual frame is first prepared by the CPU and then handed off to a GPU to be rendered as illustrated.
These representations may seem extreme, but they aren't unrealistic. To the left we see a 2-Way SLI system that is completely restricted by the CPU, and because the GPU finishes its work so much faster than the CPU, there is absolutely no performance gain to be seen with the addition of a second graphics card. On the right we see that each of our GPUs take far longer than the CPU to render, and the presence of a second graphics card has effectively doubled the frame rate. The CPU even has enough downtime to accommodate a third graphics card for better performance!
As stated before, however, this isn't how things will look all of the time. It's entirely possible that the CPU may only be minimally slower than the GPUs or vice versa, and that is just enough for us to either begin observing lower GPU scaling or under-utilization in additional GPUs. While it's true that additional performance will still be seen under this condition, how much we actually benefit is what becomes the big question, so let's examine a case where a second graphics card is added into a system where the CPU only slightly outpaces the GPU in its tasks:
Introducing a second graphics card to our system has yielded a measurable performance gain of about +15%, however our GPUs have a lot of downtime that wasn't present before. More importantly, our CPU is now constantly busy preparing new frames, and with each GPU completing its frame long before the CPU can provide it with another, we're back to being CPU-limited. If we want to see more use out of our second graphics card, that means we have some tweaking to do.
In the context of this illustration: for 2-Way SLI systems, the goal would be for our CPU to take, at most, half as long to pre-render a frame than it does for a GPU to render one. Neither component would necessarily be limiting the other and we get to see the full benefit of our second GPU. If you want to add another GPU or two in later, though, we'd have to trim down the CPU's time or increase GPU rendering time quite substantially. For 3-Way and 4-Way SLI configurations, the CPU should take at most one-third or one-quarter of the time (respectively) compared a single GPU.
Regardless of how many GPUs we're trying to manage, the takeaway message should be that this isn't necessarily a bad position we're in. That GPU downtime means we have the ability to increase our game's image quality at a lower cost to our frame rate or perhaps no cost at all, and if we were to keep pushing forward with that idea, we'd be able to force our GPUs to become the system bottleneck and further improve our GPU scaling.
We could try overclocking our CPU in order to try and reduce that GPU idle time, however this is only good up to a certain point, and it isn't necessarily an option for everyone in the first place. Some much simpler options include increasing the game's resolution (playing on multiple monitors, for example,) increasing graphics settings or enabling new ones (ambient occlusion, antialiasing, depth-of-field, draw distance, field of view, HDR, lighting effects, motion blurring, PhysX, reflections, shadow quality, tessellation, texture quality, etc.) or upgrading to 3D Vision. All of these options will not only make our game look better, but it will also increase the GPU render time which can translate to better performance scaling. - 3. Requirements
Now that we're familiar with what SLI is and what it does, let's look at what we'll need to use it. There are three key areas we'll have to focus on: the graphics card, the motherboard, and the power supply. GeForce.com maintains detailed lists for all three of these components, so everything you'd need to know and buy can be found just a few clicks in the SLI Technology section.
The Graphics Card
If you've bought an NVIDIA GeForce GPU in the second half of the last decade or so, then chances are good that you already own an SLI-ready graphics card. There are also very few restrictions regarding what GPUs can be grouped together in SLI: only the model and memory amounts have to match. For example, a GTX 580 with 1.5GB of memory could only be paired with another GTX 580 that has 1.5GB of memory, and a GTX 690 only with another GTX 690. Beyond that, manufacturers can be mixed (e.g. ASUS with MSI, EVGA with PNY,) clock speeds may vary (stock versus factory-overclocked,) the VGA BIOS for each card can be different, and no special drivers or software is required. Below is a chart with modern retail SLI-ready GeForce graphics cards, all of which are at least capable of 2-way SLI; specially marked GPUs can run in configurations of 3-way or 4-way SLI when proper requirements (motherboard, power supply, operating system) are met.
Interested in learning more about a particular SLI-ready GPU? Check out the complete list.
It's worth noting that in the case of pairing graphics cards with discrepant clock speeds, the driver will not attempt to synchronize their frequencies unless you instruct it to through tools like EVGA Precision or MSI Afterburner. This is completely optional and not doing so isn't likely to cause any adverse effects, but some people find it's easier/stabler to overclock with the GPUs running at identical speeds. Should you choose to run the cards with asynchronous clocks, it's recommended the faster GPU is installed as the primary so single-GPU or low-scaling applications can benefit from its slight performance advantage.
The Motherboard and Power Supply
With the GPUs picked out, we're in need a motherboard that can support multiple PCI-Express NVIDIA GPUs and a power supply that will drive all of that hardware. You can view comprehensive lists of both SLI-ready motherboards and high-performance PSUs by clicking on the appropriate icons below.
Motherboards

Power Supplies

- 4. Configuration
There's not much left except to start using SLI and begin fine-tuning our system for optimal performance and image quality. We'll start with getting set up, enabling SLI, and finally learn what settings in the NVIDIA Control Panel can make a real difference in our games.
Bridge Installation
With the cards installed on the motherboard and connected to the power supply, it is strongly encouraged that users also install the SLI bridge (provided with all SLI-ready motherboards.) A two-pronged bridge is used for 2-way SLI while the six-pronged bridge is meant for 3-way SLI systems. Very high-end motherboards may additionally provide an 8-pronged bridge, meant for 4-way SLI between four discrete graphics cards (as opposed to 4-way SLI with dual-GPU graphics cards like the GTX 690.) There is technically no "proper" orientation for the 2-way bridge, and if two cards running in SLI have two goldfinger ports (indicating support for 3-way SLI) the bridge does not need to be installed on a particular set; two separate 2-way bridges may be used as well, but this would be purely aesthetic as no performance gains would be earned. Although the bridge is not explicitly required to enable 2-way SLI with most GPUs, it provides a dedicated communication pathway for the GPUs to exchange data across. When this link is not present the PCIe bus will become the means of communication, which can degrade performance. 3-way and 4-way SLI configurations must use the bridge as a result of the amount of data being shared.
Activation
It should be stated first and foremost what types of SLI are supported on what operating systems. 2-way SLI is supported on all 32-bit and 64-bit versions of Windows Vista, Windows 7, Windows 8, and Linux. 3-way and 4-way SLI are supported on all 32-bit and 64-bit versions of Windows Vista, Windows 7, and Windows 8. If you are using multiple monitors, click here for requirements and connection diagrams.
When the OS detects that your new graphics card(s) have been installed, the NVIDIA GeForce graphics driver will then check them for SLI compatibility. If they pass, the NVIDIA Control Panel will reflect this by adding or updating a new section of the 3D Settings tree called "Configure SLI, Surround, Physx." Click on that link to open the configuration panel, which will contain several radio buttons (some of which may be grayed out if you are not running more than one monitor.) As shown below, all that is required is selecting the "Maximize 3D Performance" option and clicking "Apply" at the bottom-right of the NVIDIA Control Panel. Your screen will blacken and flash, possibly several times while the graphics driver re-configures itself and the GPUs for SLI. Once the desktop returns, you will be asked if you'd like to keep or revert your settings within the next few seconds; if you do not select an option before the time runs out, the drivers will revert to a non-SLI state as a failsafe in case your monitor does not return at the end of the process.
Knowing how well SLI is scaling doesn't have to be all about knowing exactly how many frames per second you had with just one GPU. The NVIDIA Control Panel includes a tool specifically to measure SLI scaling: the visual indicators. With SLI enabled, just click any link in the "3D Settings" tree and at the top will be a menu also called "3D Settings." There will be a "Show SLI Visual Indicators" option, and click it to enable it. If there is a check beside it, it is enabled. If there is not one, it is disabled. Two white vertical bars will be on the left-hand side of the screen with a green box in the middle. The box will grow in size as SLI scaling increases, so a tall box means excellent GPU scaling while a shorter box indicates more limited performance gains.
Configuration
All that remains is to break down these application profiles we've been talking about so much. In the NVIDIA Control Panel's "Manage 3D Settings" tab, we have the option of choosing between a global profile and one for an application. The global profile affects how the GPUs will render by default. That is, unless an application profile has been altered to use a certain setting, it will use the global settings (ex: if we use 16x anisotropic filtering in the global profile, all games will run with 16x anisotropic filtering.) Application profiles can control visual settings for specific games or applications which override the global settings, permitting finer levels of control for optimum performance and image quality on an individual basis. To decipher the array of options, let's separate the visual settings from the functional ones first. The visual settings can produce observable differences in how an object or surface will look in a game, while functional settings change how the GPU behaves.
Visual Settings - Ambient Occlusion: Commonly referred to as AO, this is a shading technique which approximates shadows created by edges on or around an object, like a knight's suit of armor or a mug on a tabletop. The result is more realistic shadows, although this will have the GPUs working noticeably harder to produce the effect. Applications that support ambient occlusion natively may also support for driver-level ambient occlusion, but be careful to only enable one at a time as both AO implementations will be used and overlap each other, costing additional performance and perhaps introducing artifacts. Want to learn more? Read the GeForce.com Ambient Occlusion Guide.

- Anisotropic Filtering: When your GPU wraps a texture around an object, its surfaces will almost never be facing you perfectly flat. Instead, any given surface will probably be at an angle - sometimes a very extreme one - meaning that one end is larger than the other. Using just one texture for this object becomes insufficient, even if it's very high-resolution, because the surfaces at steeper angles won't receive enough detail and thus appear blurry. For this we depend on something called mipmaps, which are pre-rendered, differently-stretched versions of one texture that can be used depending on the angle and distance of a object surface. Anisotropic filtering adjusts how much these mipmaps are used, with higher levels progressively sharpening far-off textures or those at sharper angles. Typically this only has a minimal impact on performance with modern hardware.

- Antialiasing - FXAA: Antialiasing, explained in detail below, traditionally smooths the edges of objects by taking multiple color and depth samples at very precise points within a single pixel before rasterization. FXAA is NVIDIA's new approach to antialiasing, and it has quite a few advantages: it's easy for games to support, it can have significantly higher performance and lower memory usage compared to standard multisampling, smooths edges on objects and transparent textures, and can smooth edges at virtually any angle. Enabling this through the NVIDIA Control Panel can make text appear fuzzy, so it's recommend to leave this disabled on the global profile and either enable it on a per-application profile basis or through the application itself.

- Antialiasing - Gamma Correction: When antialiasing the edge of an object, the combination of color samples isn't always perfectly represented on the monitor, and so sometimes antialiasing can produce unusually-colored "halos" around edges. This setting reduces this by changing the way the colors are combined, consuming no extra performance. Only affects OpenGL applications.
- Antialiasing - Mode: This allows the user to determine whether the application determines the type of antialiasing used (application-controlled,) if the driver brute-forces its own setting in the application profile (override,) if the driver applies antialiasing in addition to the game's (enhance,) or if antialiasing is disabled entirely (off.) Overriding/Enhancing antialiasing may require the application already be using at least 2x MSAA. Enhancing a game's antialiasing mode will improve image quality by applying additional sampling, which comes at a higher performance cost.
- Antialiasing - Setting: There are only so many pixels in a monitor - a finite level of detail. While this is fine for giving us crisp text and sharp lines, it becomes a problem when we try to view a line or edge at an angle that isn't absolutely vertical or horizontal because it must go from one column or row of pixels to the next. This creates a sharp and jagged appearance that can be very distracting, especially as edges become more complex. This is known as "aliasing." Antialiasing, as you may expect, is a way of reducing the prevalence of these jagged edges. This is done by taking multiple data points within each pixel and blending them together so transitions between two objects appears more smooth and natural. The impact on performance and image quality increases with the setting used. Click here to see a visual comparison of different modes.

- Antialiasing - Transparency: Although antialiasing works very well on actual objects, it can't sample colors on the edges of textures with transparencies, like chain-link fences or leaves on trees. Transparency Multisampling is less expensive to use than any of the Supersampling modes, but only works in DirectX 9 applications and won't offer as much of an image quality improvement.

- Texture Filtering - Anisotropic Sample Optimization: When "High Quality" texture filtering (see below) is not used, you could opt to exchange a slight amount of image quality for performance in anisotropic filtering. This usually won't have any effect visually, but if textures do seem to "crawl" when you move in-game, try turning this off.
- Texture Filtering - Negative LOD Bias: The LOD bias, or a Level of Detail bias, is a number used by the GPU to determine which mipmaps to use when drawing a texture on a surface. Some games will attempt to use a negative LOD bias to sharpen textures (since this calls for using larger mipmaps,) but this can also cause textures to crawl or shimmer. Setting this to "Allow" will permit negative LOD biases to be used. Setting this to "Clamp" will prevent the LOD bias from dropping becoming negative. Only affects OpenGL applications.
- Texture Filtering - Quality: This controls how many optimizations are applied to textures, with four separate levels to choose from: High Quality, Quality, Performance, and High Performance. High Quality applies no optimizations whatsoever to a texture, while Quality will only use optimizations that don't affect a texture's appearance. Performance and High Performance will both apply stronger optimizations to offer better performance at the cost of image quality.
Functional Settings - CUDA - GPUs: If you'd prefer, you can specifically designate which of your CUDA-enabled GPUs can be used for computing purposes (including PhysX.)
- Maximum Pre-Rendered Frames: The CPU must always be at least one step ahead of the GPU so it has time to prepare each frame, but when there is ample time, the CPU can prepare up to 8 frames ahead of the GPU (up to 4 is selectable through the NVIDIA Control Panel.) Being set that high can smooth out performance at low frame rates but it will introduce some lag to your mouse and keyboard actions. Lower values (default is 3) mean the CPU will draw fewer and fewer frames ahead, which can reduce input latency. Only effective for non-SLI configurations.
- Multi-Display/Mixed-GPU Acceleration: This is to ensure compatibility with single or multi-monitor configurations. When using a single monitor, this should be set as "Single Display Performance Mode" unless significant visual artifacting (unrelated to GPU overclocking or overheating) is seen, in which case "Compatibility Performance Mode" should be selected instead. If using more than one monitor, this ought to be set at "Multiple monitor Performance Mode." If you notice artifacting on a multi-display setup, you may select the compatibility mode to remedy the situation.
- Power Management Mode: Modern GPUs are built to work in one of several "power states," which are predetermined clock speeds that are meant to correlate to the amount of work being done by the GPU. If the GPU is not being used much, a low-power state is selected and the GPU will slow down to consume less power and produce less heat. When the GPU starts working hard its maximum performance state can be activated, which applies higher clock speeds to yield better performance. By adjusting the performance of the GPU with the amount of work it does, our system can more efficiently manage its resources. This is how the "Adaptive" power management mode works, and although this process is typically not noticeable, performance enthusiasts may yet prefer that their GPUs always be in their high-performance state. In that case, there is the "Prefer Maximum Performance" setting, which locks the GPU in its highest power state while the application is running. This setting has no effect on desktop idle speeds and temperatures when changed in the global profile.
- SLI Performance Mode: This controls the SLI rendering mode used globally or with the specified program. 2-way SLI configurations will have access to Single-GPU, Alternate Frame Rendering 1, and Alternate Frame Rendering 2 modes. 3-way and 4-way SLI configurations, in addition to the 2-way modes, will have access to 3-way and 4-way AFR modes. In many games and applications, the rendering mode is set to a pre-configured and optimized setting using options not available through the NVIDIA Control Panel directly. If changes are applied to this setting for a game, the Restore button will bring back NVIDIA's custom mode.
- Threaded Optimization: The driver can allow multi-threaded 3D applications to utilize a second physical processor for better performance and workload balancing. "Auto" is the recommended option for best compatibility with both older and newer programs, and may need to be disabled if problems occur.
- Triple Buffering: Graphics cards render frames using a technique called double buffering. The GPU stores the frame currently being displayed on your screen into its "front buffer," while the frame it's currently rendering resides in the "back buffer." When the GPU is done rendering the frame in the back buffer, the front buffer is cleared out and the contents of the back buffer are copied into the front buffer, ready to be displayed to the monitor. A problem that can occur in this process is due to how vertical synchronization works (covered below.) When the GPU has a frame in its front buffer and has finished rendering the frame in its back buffer, it must wait for the monitor to refresh itself and be ready to show a new frame before the back buffer can be copied over to the front. During this time, the GPU is doing no work at all. Triple buffering forces the card to create a third buffer, a "middle buffer," to act as a second back buffer. The GPU is now able to keep working when it's waiting for the monitor to refresh because it can complete the frame in the back buffer, then immediately begin working on the next frame in the middle buffer. This may introduce slightly higher input latency at lower frame rates. This can only be used in conjunction with vertical synchronization. Only affects OpenGL applications.
- Vertical Sync: Vertical Synchronization is the act of limiting the number of frames per second your GPU can create, which is set to your monitor's refresh rate. For example, a display with a refresh of 60 Hz would mean you could achieve a maximum of 60 FPS. This has the benefit of eliminating "tearing," or the noticeable overlapping of incomplete frames, though with the chance of affecting smoothness. Vertical sync may be forced on or off, or with Release 300 drivers, be set to Adaptive. Adaptive vertical sync dynamically toggles synchronization, enabling it when your FPS is the same the monitor's refresh rate to avoid tearing, then disabling it when it falls beneath that to avoid stuttering. Adaptive V-Sync can also be set to function at half the refresh rate for applications where the observed frame rate is approximately half the display's refresh rate (ex. 25-35 FPS on a 60 Hz display) to provide smoother gameplay in more demanding circumstances.
- How to Build a Quad SLI Gaming Rig
Introduction
The launch of GeForce GTX 590 brings with it the ability to build a Quad SLI gaming PC - four GTX 500 GPUs combined to deliver some wicked FPS. The system requirements of Quad SLI may not be for the faint of heart, but if you have the budget and the skills to build a Quad SLI rig, then you'll end up with the sweetest PC on the block.
To help you get started we've outlined the essential components needed for a reliable and fast Quad SLI dream PC, and some system design considerations you may wish to consider.
The Shopping List:
Graphics Cards
Of course, you'll need two GeForce GTX 590 graphics cards. With SLI, you can mix graphics card manufacturers, so one GTX 590 card from Firm A, and a second GTX 590 card from Firm B is OK.
Motherboard
GeForce GTX 590 in a Quad SLI configuration requires a SLI-certified motherboard with an extra PCIE slot between the two, double-width cards to ensure both receive enough cool air. If you're water cooling the cards, you can get by without this extra slot, but for air-based cooling it is a necessity.
The clear air between the two GeForce GTX 590 graphics cards ensures that thermal performance remains within acceptable limits.
Quad SLI certified motherboards that have the correct connector spacing for use with dual GTX 590s are as follows: - ASUS Maximus III Extreme
- ASUS P6T7 WS Supercomputer
- ASUS P8P67 Deluxe
- ASUS P8P67 Pro
- ASUS P8P67 WS Revolution
- Asus Rampage III Extreme
- ASUS Rampage III Formula
- ASUS Sabertooth P67
- DFI LanParty_DK_P55_T3EH9
- EVGA P55 E658
- EVGA X58 FTW3
- Gigabyte GA EX58 Extreme
- Gigabyte GA-P55-UD5
- Gigabyte GA-P67A-UD5
- Gigabyte GA-P67A-UD7
- Gigabyte GA-X58A-UD7
- Gigabyte GA-X58-UD9
- MSI Big Bang - Trinergy
- MSI P67A-GD65
- MSI X58 PRO-E
CPU
With the combined power of four GTX 500 GPUs, Quad SLI can be easily bottlenecked by the central processor. Therefore, it's important in this case to have a fast CPU to get maximum performance. Core i7 CPUs with Turbo Mode enabled are highly recommended, and for even better performance, you may even want to consider overclocking your processor. - AcBel PC8055-000G 1100W
- Antec HCP-1200
- Corsair AX1200
- Nexus RX-1.1K Gold
- Silverstone ST1500
- Thermaltake Toughpower W0171 1500

Chassis
A good computer case provides the proper airflow for cooling the graphics cards, without sounding like a jet engine. The optimal chassis has multiple fans that draw in cool air and push out hot air, with a large fan positioned on the door or side panel to blow cool air over the graphics cards. The case must also support an 11 inch graphics cards. As with the power supplies, NVIDIA works with manufacturers to ensure that their cases are certified for use with Quad SLI configurations, and as of today the list of certified cases is as follows: - Coolermaster HAF X
- Thermaltake Element V

Watercooling
While the right case and air-cooling setup can result in low temperatures in a Quad SLI PC, water cooling can take thermal performance to the next level, resulting in an even cooler, quieter system that can be heavily overclocked. We've worked with several of the top water cooling companies in the world to build custom water blocks for the GeForce GTX 590, including: - EK
- DangerDen
- Coolit
System RAM / Operating System
For the best performance possible in a Quad SLI configuration, 6GB of system memory is highly recommended, and because of this the use of a 64-bit operating system is required. Windows 7 64-bit is recommended, though Windows Vista 64-bit will also suffice. - System Design Considerations:
Now that you have all right hardware to build your Quad SLI system, here are a few tips for building your rig:
1) Cable management
Keep your power and SATA cables tidy and out of the path of airflow between the system fans and the graphics cards. The same applies for hard drives, optical drives, and any other cables.
2) System fan settings
Check your BIOS to make sure your system fans are set to high to maximize thermal performance, or enable PWM-cooling so your system remains quiet when idle, but cranks up the fans automatically when heat levels rise. Utilities like SpeenFan can allow you to dynamically control your system fans based on the temperature of the GPUs.
3) BIOS
Make sure you have the latest BIOS firmware for your motherboard - important updates may be available that improve PCI Express and SLI performance, or enable compatibility with new components.
Finally make sure to grab the latest driver for GTX 590 Quad SLI support.
With the correct Quad SLI-certified components and some basic system-building skills, you should be well on your way to a having a great Quad SLI gaming PC, capable of playing games at the highest possible quality settings and resolutions. Have fun!
Back to Top
How to enable Hybrid SLI
HybridPower mode switching is now performed automatically. It can still be controlled manually via the Hybrid SLI control panel but for this tray icon to show up it needs special System BIOS support from the motherboard manufacturer. If supported please see instructions on manually switching HybridPower modes, please download the NVIDA Hybrid SLI User's Guide from the URL below:
http://www.nvidia.com/content/hsli/configurator/assets/pdf/NVIDIA_Hybrid_SLI_User_Guide.pdf

